Setting Up Nextflow and AWS Batch
By: Kelsey Florek
April 29, 2020
Amazon Web Services Batch is a service that allows users to submit jobs to job queues while specifying the application to be run and compute resources that are needed by the job. Working in concert with Nextflow, AWS Batch can be configured to run Nextflow processes in defined compute environments minimizing the cost of cloud resources.
Useful Resources
This tutorial was written using Alex Peltzer’s guide and Anthony Underwood’s guide as resources. In addition there are several other resources that you might find helpful when setting this up.
- Nextflow AWS Batch Blog Post
- Nextflow AWS Batch Documentation
- List of Nextflow pipelines and Tutorial’s
- Nextflow Gitter Chat
Table of Contents
- Step 1 Setting up a Nextflow user with IAM
- Step 2 Building a custom Amazon Machine Image
- Step 3 Define AWS Batch compute environment
- Step 4 Creating an AWS Batch Job queue
- Step 5 Setting up an S3 Bucket for data access
- Step 6 Configuring Nextflow to use AWS Batch
- Tips and Tricks
Step 1 Setting up a Nextflow user with IAM
You may be tempted to skip this step if you already have a user with access to AWS. However, it is a best practice to have a separate programmatic user account that only has access to specifically designated credentials. This step is also valuable in understanding and setting up the access policies that both Nextflow and AWS Batch need in order to operate. This guide will give broad access to specific areas of AWS including S3, AWS Batch, and EC2. It is possible to create a more restricted user, however there is a number of additional steps to be sure the programmatic user has the correct access credentials. For the sake of complexity this guide only covers the broad approach.
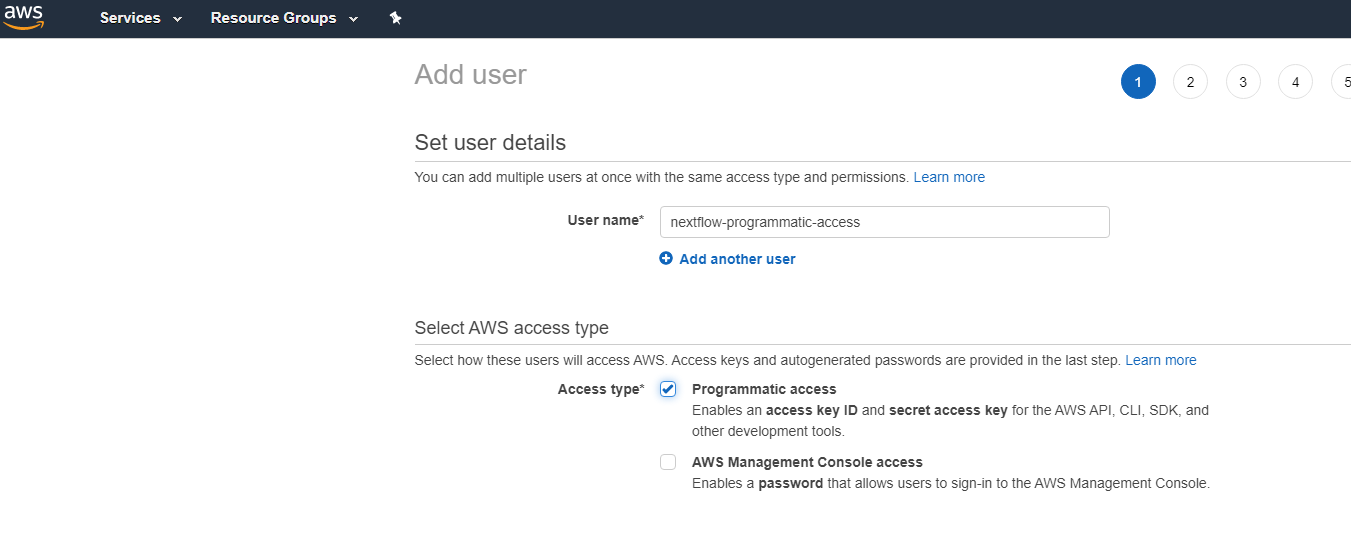
Step 1.1 Adding a programmatic user
Navigate to the IAM Service and click on Users. Then click Add user and in the User name box add the user name that you would like, here I used nextflow-programmatic-access. Then select the box for Programmatic access. When you’ve finished click the Next: Permissions button.
Step 1.2 Create a user group
Next we need to create a group for this user to be a part of. We will later add policies to this group specific to Netflow. Click on the Create Group button.
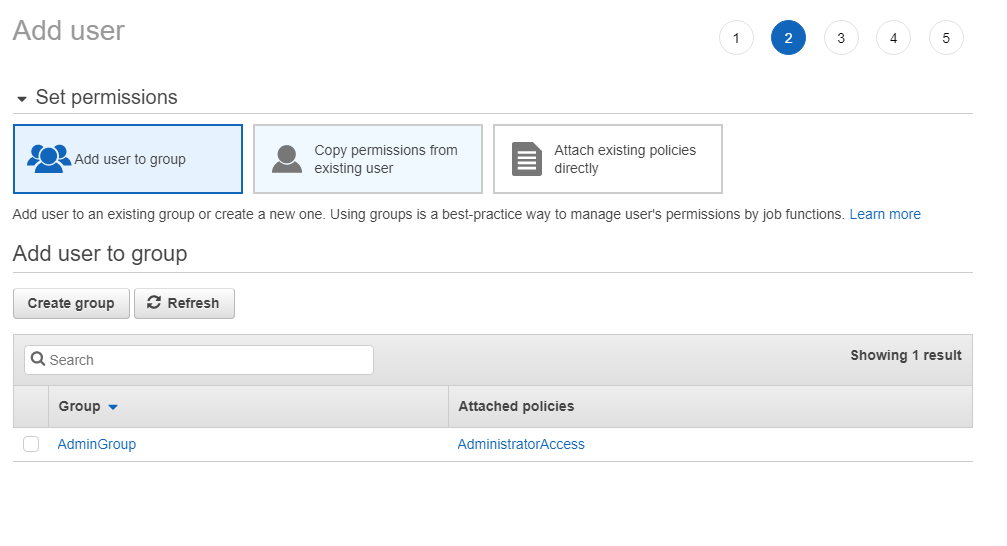
In the Group name box add the name of the group here I used nextflow-group. Then click the Create group button.

After adding the group click the Next: Tags.
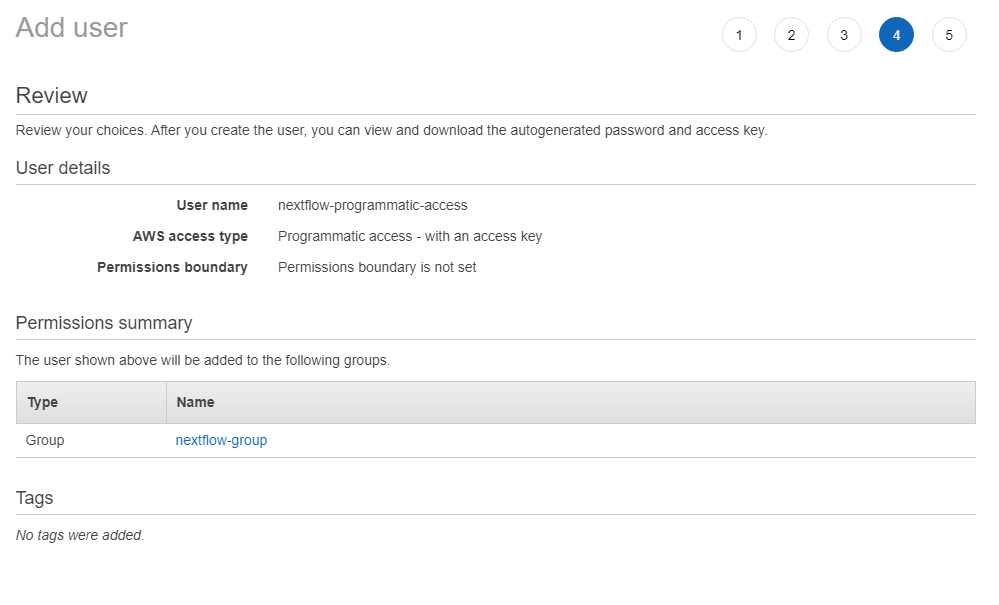
Step 1.3 Adding Metadata tags
This page will allow you to add any extra tags to the account to assign metadata. These can be used for billing information or programmatic select but these are optional and not really necessary for function. After you’ve completed click Next: Review. Here you should be presented with a screen that looks similar to below. Click Create user to finish the user creation.
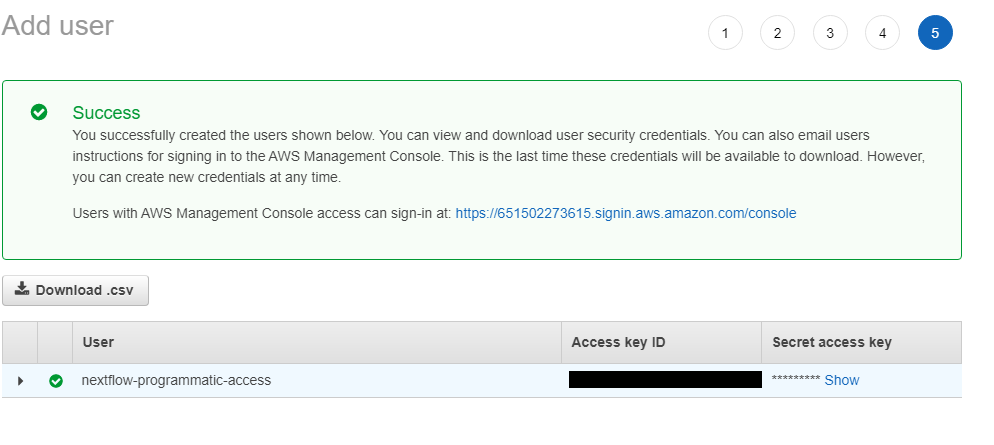
Step 1.4 Obtain Secret Access Key
After user creation there will be a page that provides the security credentials for using the new Nextflow user. This includes the Access Key ID and Secret access key. These are crucial and are only generated once at this step. If they are lost you will have to delete and create a new user using the steps above. Click the Download .csv button and keep the file in a safe and secure location. These access credentials will be needed later.
Step 1.5 Attach access policies to user group
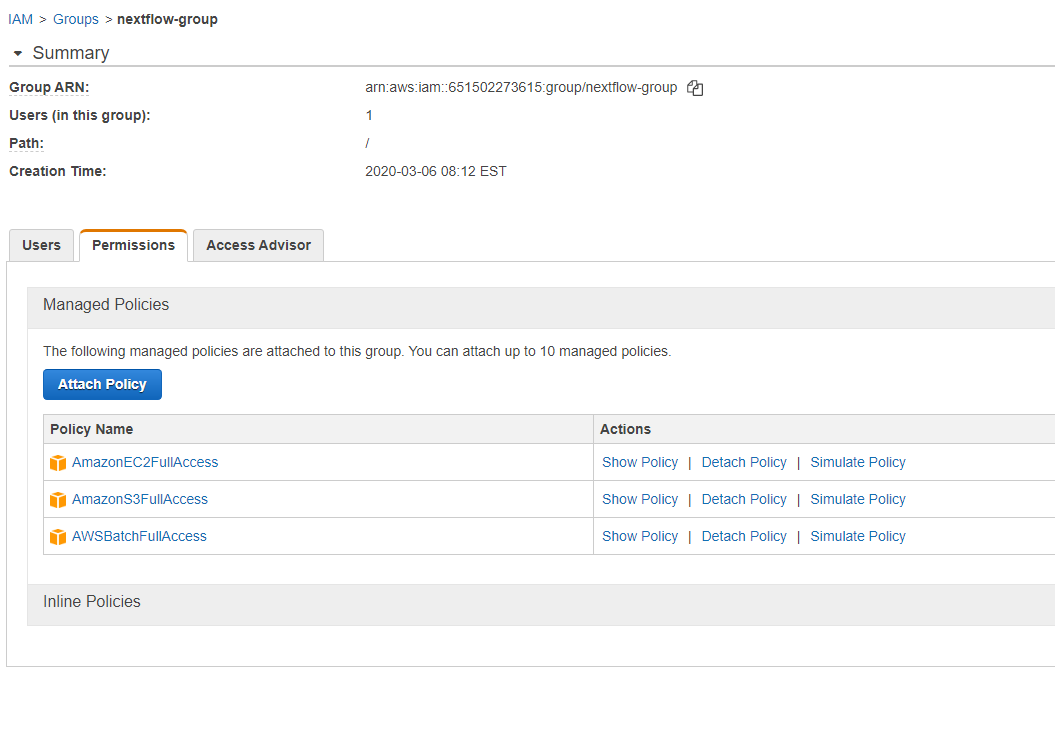
From the IAM user panel click Groups and click on the nextflow group created above, here we used nextflow-group. Then click on the Attach Policy button.
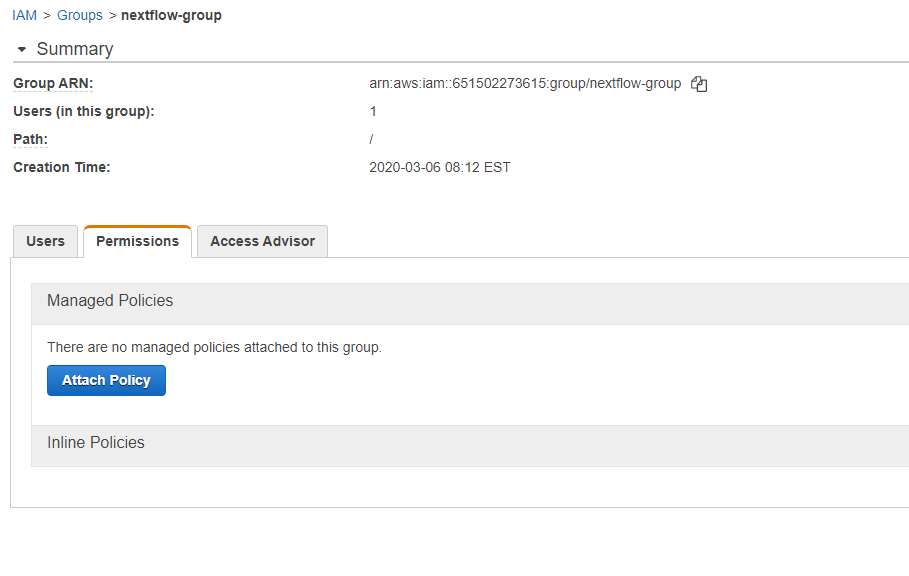
From here we will add the following 3 policies:
- AmazonEC2FullAccess
- AmazonS3FullAccess
- AWSBatchFullAccess
You can find these by typing them into the Filter box.
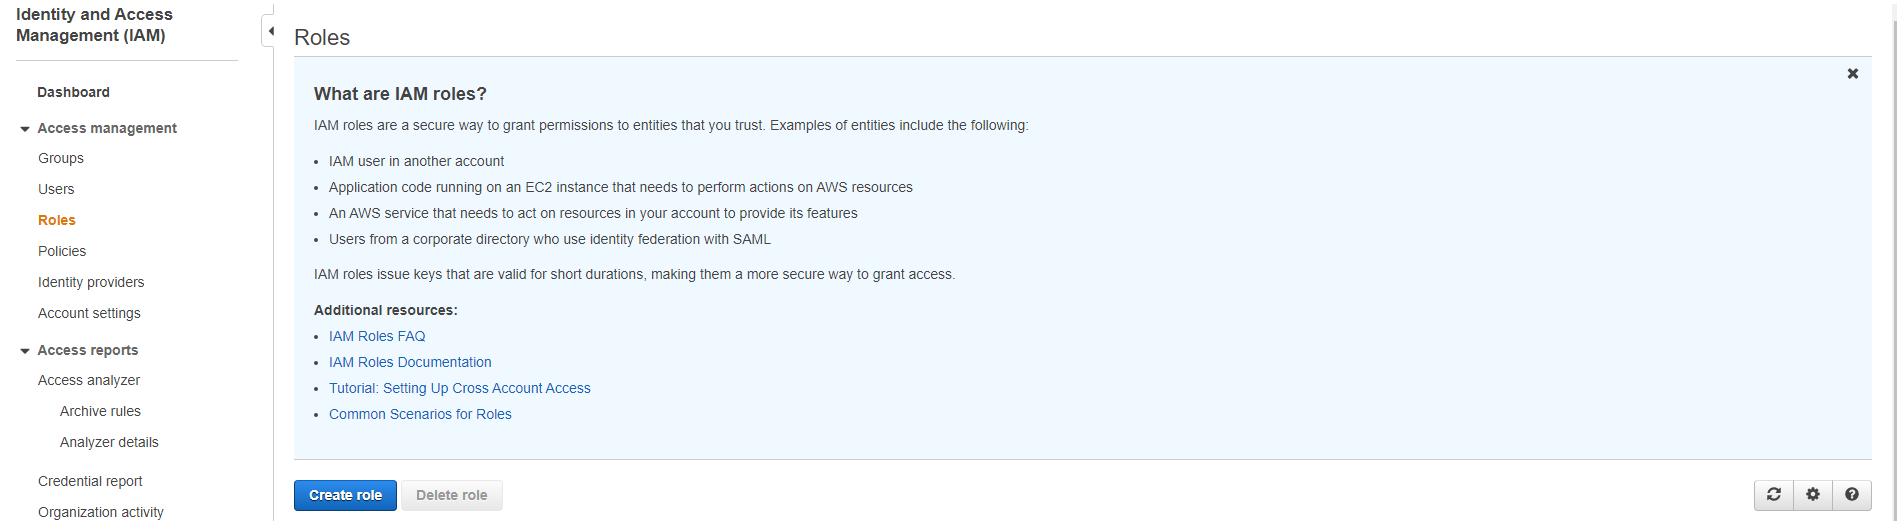
Step 1.6 Create permission roles for running AWS Batch
From the IAM user panel click the Roles button. Here we will create a role for running EC2 Spot Instances. If you would rather create on-demand instances only you can skip this step, however you can achieve significant cost savings using Spot Instances. Click the Create role button.
On the create role page scroll down and find and click on EC2.
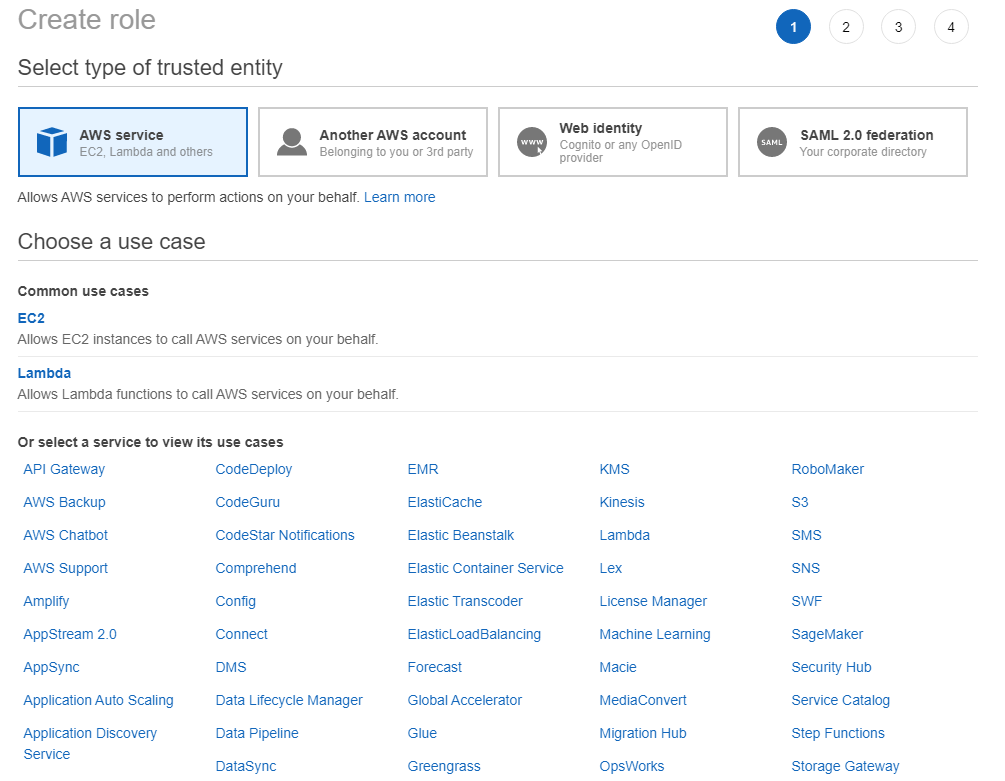
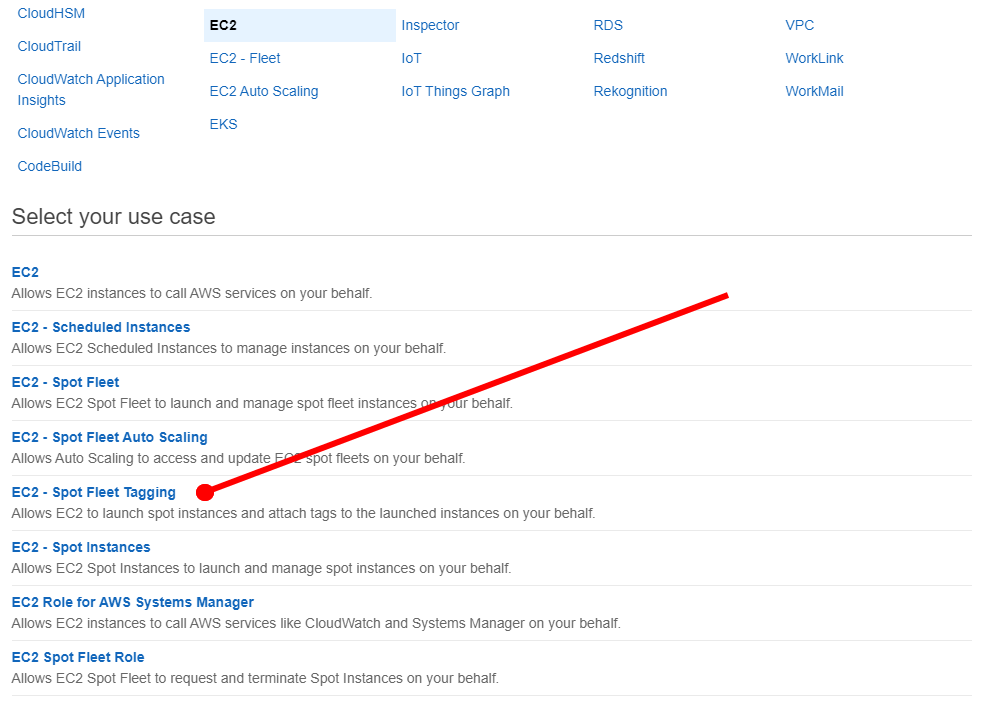
Then select the EC2 - Spot Fleet Tagging use case and click the Next: Permissions button you should see the screen below.
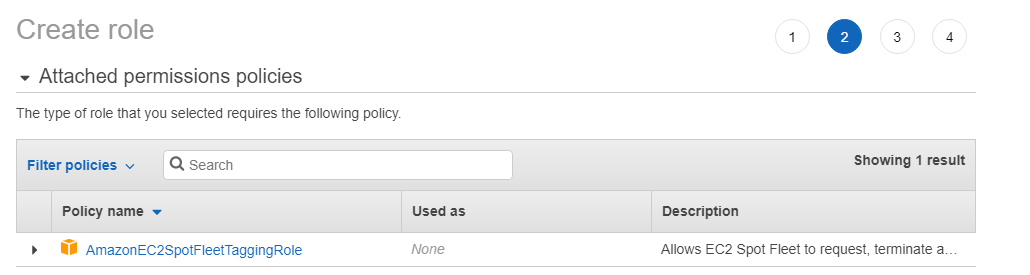
Click the Next: Tags button add any additional metadata tags you would like then click the Next: Review button. Then fill out the Role name box with the name for this Role, here I used AmazonEC2SpotFleetRole.

Once finished click the Create role button.
Step 2 Building a custom Amazon Machine Image
Amazon Machine Images or AMIs are used to create EC2 compute instances on AWS Cloud. In order to use Nextflow in combination with AWS Batch we will be using AWS’s Elastic Container Service (ECS). This allows Nextflow to use Docker containers as the running environment for the steps in the workflow. For this to work there are a few additional modifications that need to be made to the base ECS image. These modifications allow Nextflow to communicate with the running instances and shuttle data between S3 Buckets, your local work environment, and running instances. This image will be used for every AWS instance that is created by Nextflow. It is advisable to create a minimal set of AMIs as they are stored at $0.05 per GB-month. Note that this is measured by the amount of data actually used not the size of the volume. So specifying a larger volume size doesn’t affect the overall price. In reality the cost of storing AMIs is usually minimal (a few dollars a month) and can be tracked under the AWS Cost Management, Cost Explorer.
Step 2.1 Startup the base ECS image in a virtual machine
To create our custom AMI the first step is to startup a virtual machine running the base ECS image. To start goto the EC2 Service in the AWS management console. Then click Instances and Launch Instance. To find the base ECS AMI, type ECS in the search box and select the Amazon ECS-Optimized Amazon Linux AMI image under the AWS Marketplace.

A window will pop-up displaying the pricing information for using the AMI. Select Continue. The next step is to choose an instance type. Since we are creating this instance to customize the AMI we can select a small instance. Here I chose the t2.medium.

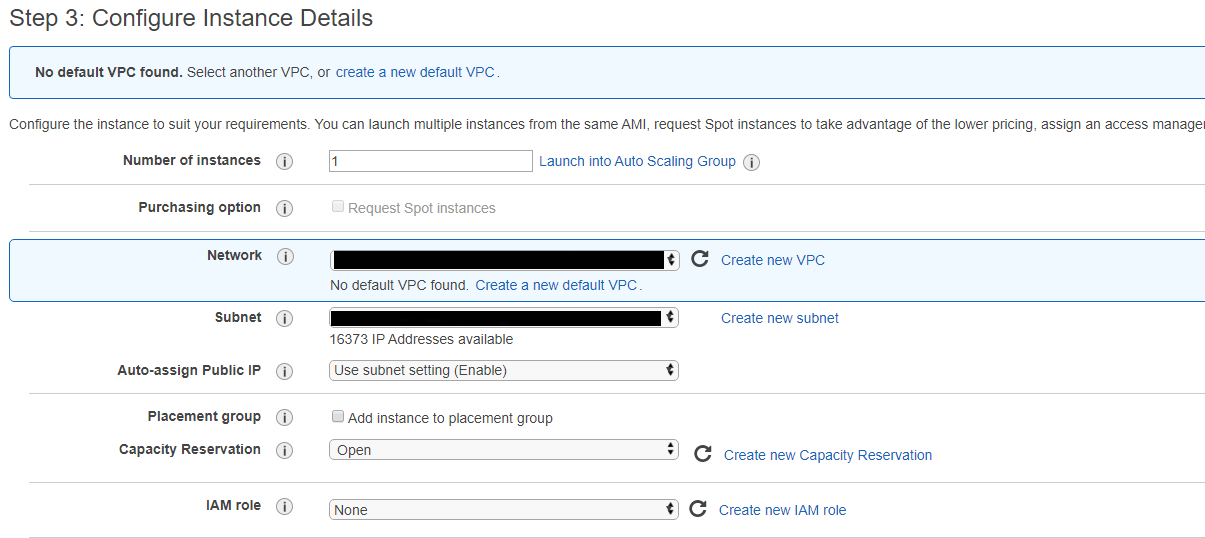
The next step is configuring the instance details which can be configured to how you would normally set up an instance for interactive access. Here I use the default settings.
In the add storage step we have an option to update the space available to the Docker container. By default the space is set to 22 GB. This is the allowed space that can be used by docker on the image. Update the storage space for the needs of your pipeline. I choose to set it to 100 GB, which provides enough space for all the reads from a typical MiSeq run to fit in a single job with a bit of room to spare. You can change this to any amount you think is necessary for your pipeline.
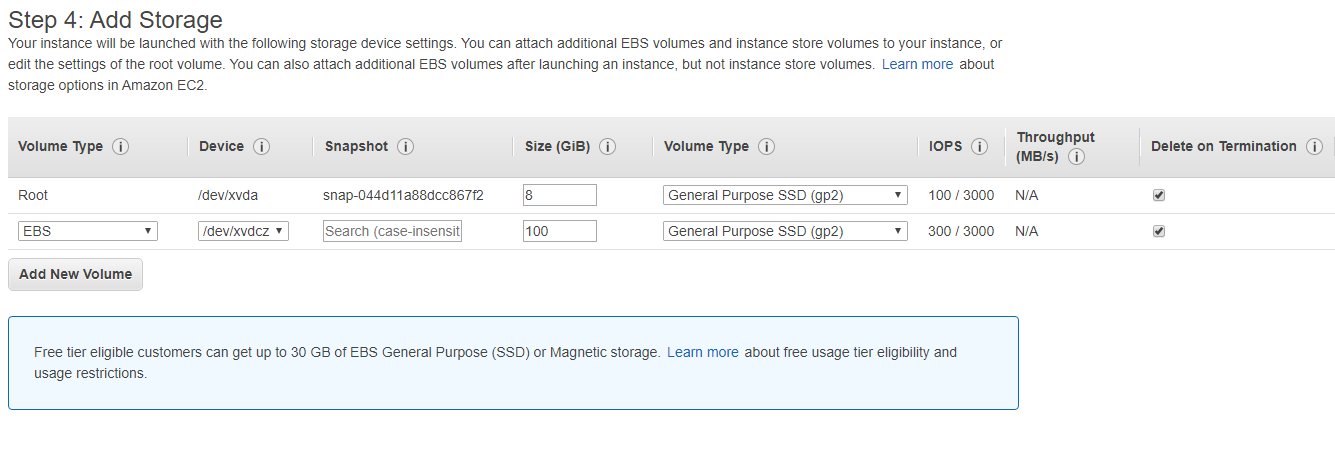
Once the instance storage is configured click the Next: Add Tags button and add the metadata tags you see fit. Once finished click the Next: Configure Security Group. Configure the instance so you can access it interactively. Once you have finished click the Review and Launch.
Step 2.2 Install dependencies for Nextflow
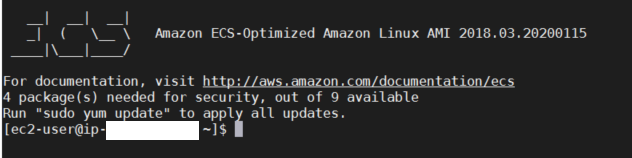
Once the instance is up an running login into the instance using the credentials you selected using the ec2-user account. Once logged in you should see a screen similar to below.
The first step is to adjust the size of the docker storage device to match the updated size. If you use the command docker info you’ll notice the Base Device Size: 10.74GB. We need to update this by editing the docker configuration file in /etc/sysconfig/docker-storage. Using sudo vi open the file and add --storage-opt dm.basesize=100GB adjusting the 100GB to reflect the size you picked above. The file should look something like this:
DOCKER_STORAGE_OPTIONS="--storage-driver devicemapper --storage-opt dm.thinpooldev=/dev/mapper/docker-docker--pool --storage-opt dm.use_deferred_removal=true --storage-opt dm.use_deferred_deletion=true --storage-opt dm.fs=ext4 --storage-opt dm.use_deferred_deletion=true --storage-opt dm.basesize=100GB"
To verify the changes use the command sudo service docker restart and see the changes with docker info.
After configuring docker the next step is to install AWS-CLI. This is needed by Nextflow to send data from each step. The easiest way is to install via miniconda with the commands below:
curl https://repo.anaconda.com/miniconda/Miniconda3-latest-Linux-x86_64.sh -o Miniconda3-latest-Linux-x86_64.sh
bash Miniconda3-latest-Linux-x86_64.sh -p /home/ec2-user/miniconda
/home/ec2-user/miniconda/bin/conda install -c conda-forge awscli
/home/ec2-user/miniconda/bin/aws --version
Step 2.3 Create the custom AMI
Once AWS-CLI is installed you can save the image by choosing Action Image -> Create Image on the selected image. Give the image an appropriate name and when it has finished creating the image you can terminate the instance. Make note of the AMI ami-01dec29g8b4d78253 this will be used later.
Step 3 Define AWS Batch compute environment
AWS Batch is made of two parts a queue where jobs are submitted and a compute environment, which defines what type of instances are used to run those jobs. Nextflow submits jobs to a specific AWS queue (defined in the Nextflow config file) allowing AWS Batch to handle the rest. To set this up go to the Batch service in the AWS management console. If this is your first time using batch you will see a screen like below. Click the Get Started button.
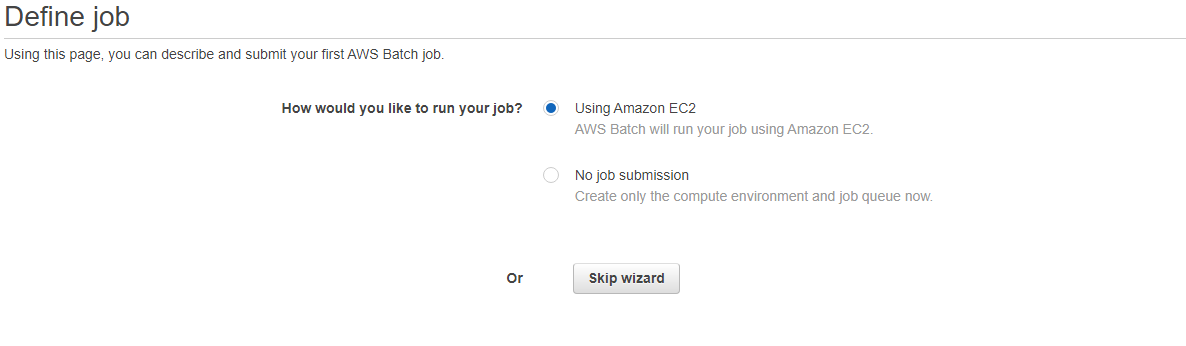
You will then see the setup wizard for AWS Batch. The wizard doesn’t setup things the way we need so we will select the Skip wizard button shown below.
Step 3.1 Select compute environment name and permission roles
Once you are at the AWS Batch dashboard select Compute environments and Create environment.

Then select the box for Managed in the compute environment type if not already selected and enter a name in the Compute environment name.
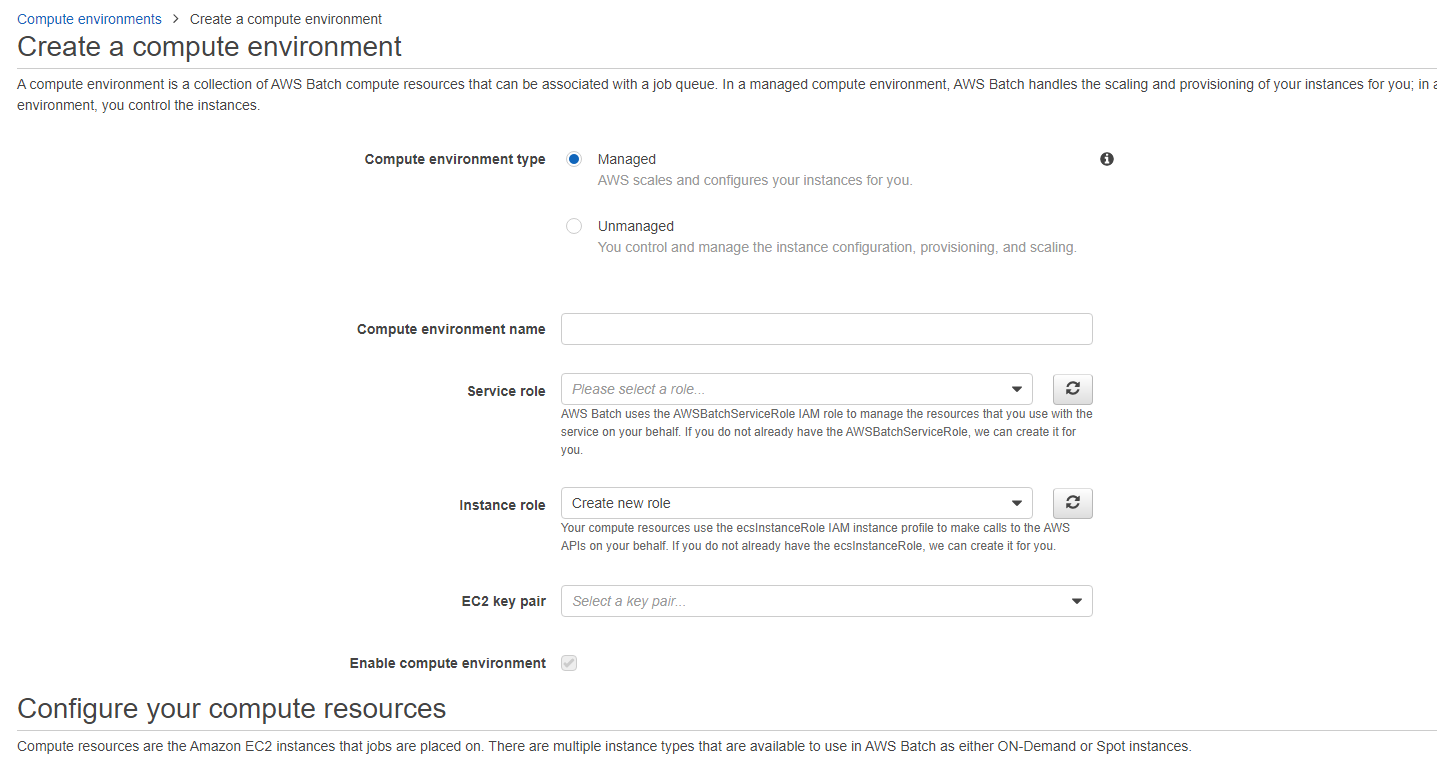
Next select Create new role for both Service role and Instance role. AWS Batch will create roles with the needed permissions. However, we will need to add an additional policy to the ecsInstanceRole later to use AWS S3. You may select an EC2 key pair to be able to ssh into the instance but this is optional.
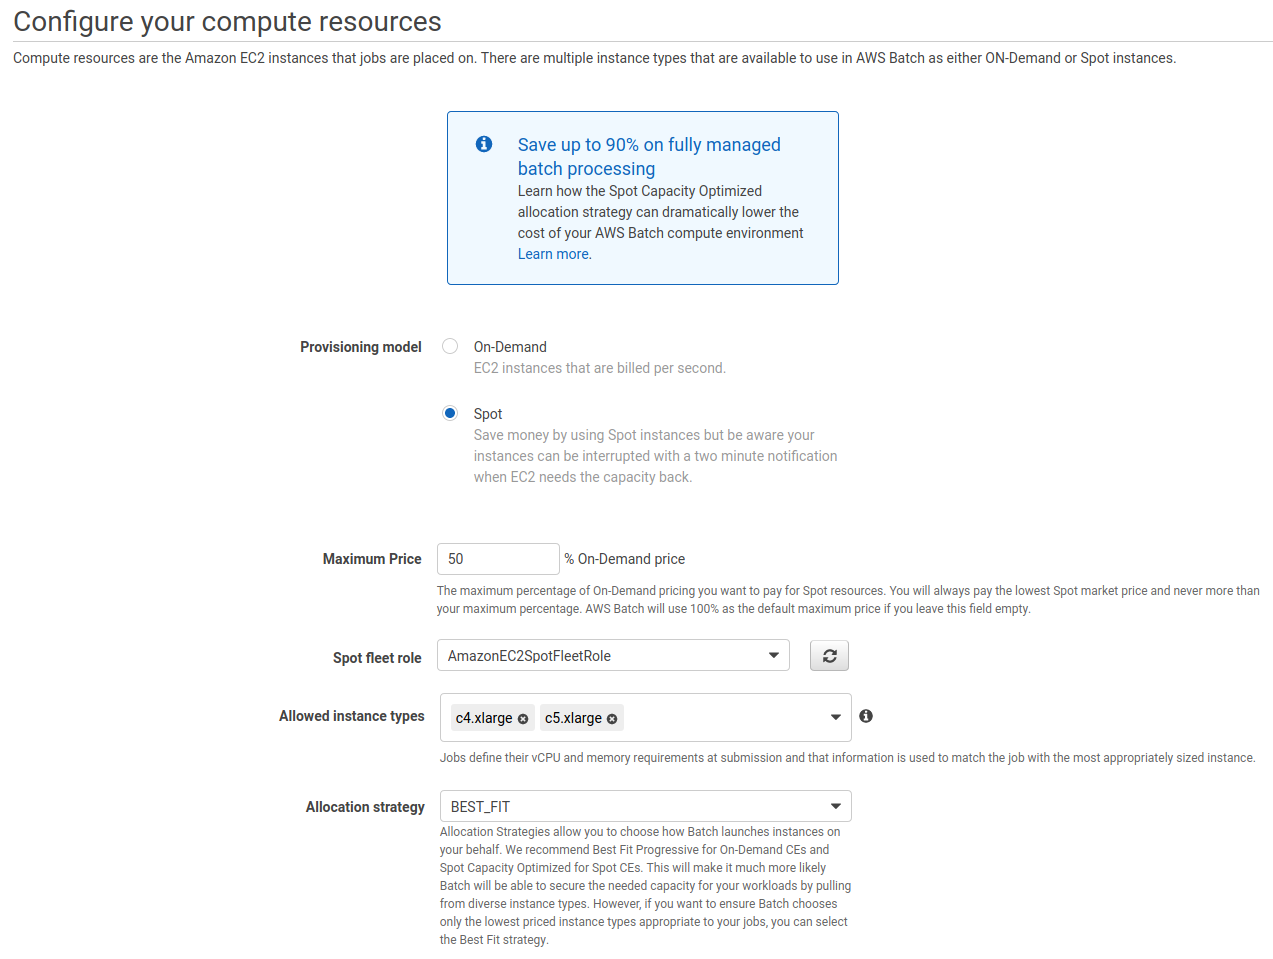
Step 3.2 Define compute environment resources
Here we can define if we want to use On-Demand or Spot. If using On-Demand simply select On-Demand in the Provisioning model and define the Allowed instance types with instance types you wish to use i.e. c4.xlarge or c5.4xlarge. Set Allocation strategy to BEST_FIT and continue on to Step 3. Note if you want jobs to be spread across multiple instances it is better to select smaller instances than larger. The best fit model for both on-demand and spot will tend to group multiple jobs into 1 larger instance. This can reduce cost but lead to issues with data storage space if too many jobs are put on a single instance.
If you would like to use Spot instances, which can be run at a fraction of the price of the on-demand instances. Under Provisioning model select Spot. Then set the Maximum Price valued by the % of the On-demand price. Here I picked 70%, which seems to work well. You could also select 100% which means you are willing to go all the way to the On-demand price but if there is a lower price available you’ll still get it. Note if this value is set too low you may not get spot instances when demand is higher.
Then under the Allocation strategy select BEST_FIT and choose the AmazonEC2SpotFleetRole we created earlier. Finally under the Allowed instance types select instance types you wish to use i.e. c4.xlarge or c5.4xlarge. I usually use the c4 and c5 family of instance types but this should be tailored to your workflow.
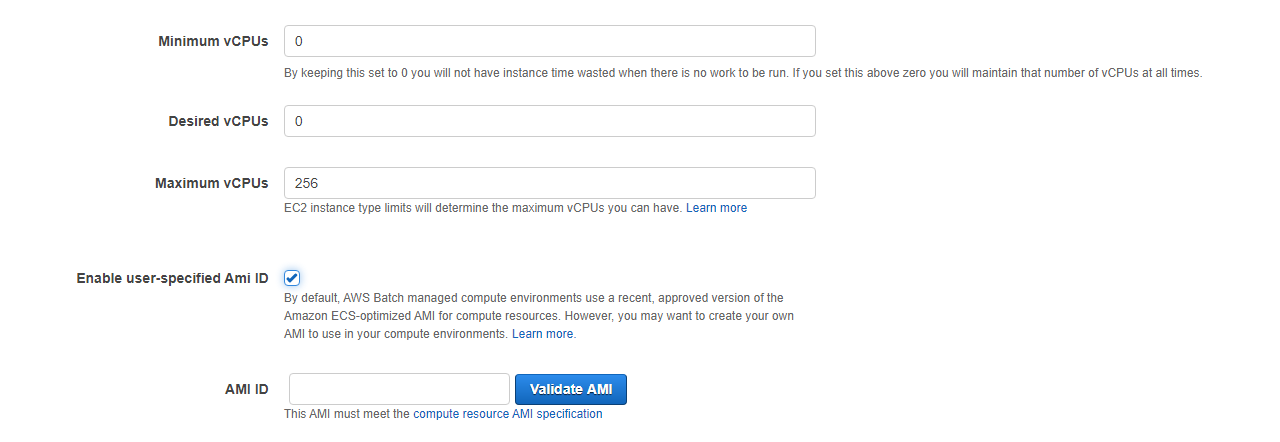
Step 3.3 Determine compute environment limits
Next you will see 3 options including Minimum vCPUs, Desired vCPUs, and Maximum vCPUs. These are used to define the amount of resources that can be used. Note: the values are vCPUs not number of instances, so if you only allow instances with 16 vCPUs to be used in your compute environment and you set the minimum vCPUs to 1. You will always have a 16vCPU instance running. The values are further defined as:
-
Minimum vCPUs - The minimum number of virtual resources that must be kept running at all times. Setting this to 0 means all resources will be shutdown when not in use. 0 is recommended for cost savings.
-
Desired vCPUs - This is how many vCPUs you would like to see used. Nextflow will dynamically change this value so we can leave it set to 0.
-
Maximum vCPUs - This is the maximum number of vCPUs that could be running at any one time. I typically leave this set to
256but you can alter it as you see fit.
Finally we need to select the AMI we created in the previous section. Check the box for Enable user-specified AMI id and enter the AMI from above then click Validate AMI.
Step 3.4 Create the compute environment
At the last step, define the subnet you would like your instances to run on (usually just default) and security group then click Create
Step 3.5 Update the ecsInstanceRole
AWS Batch just created the ecsInstanceRole for us but we need to add the S3 role to allow access to data stored in S3 buckets. Go to the IAM service as done in Step 6 in the Setting up a programmatic user with IAM section. Under Roles enter ecs in the search box and click on the ecsInstanceRole. Click the Attach policies and enter S3 in the filter box and select the AmazonS3FullAccess, then click Attach policy.
You should have both the AmazonS3FullAccess and the AmazonEC2ContainerServiceforEC2Role policies attached to this role.
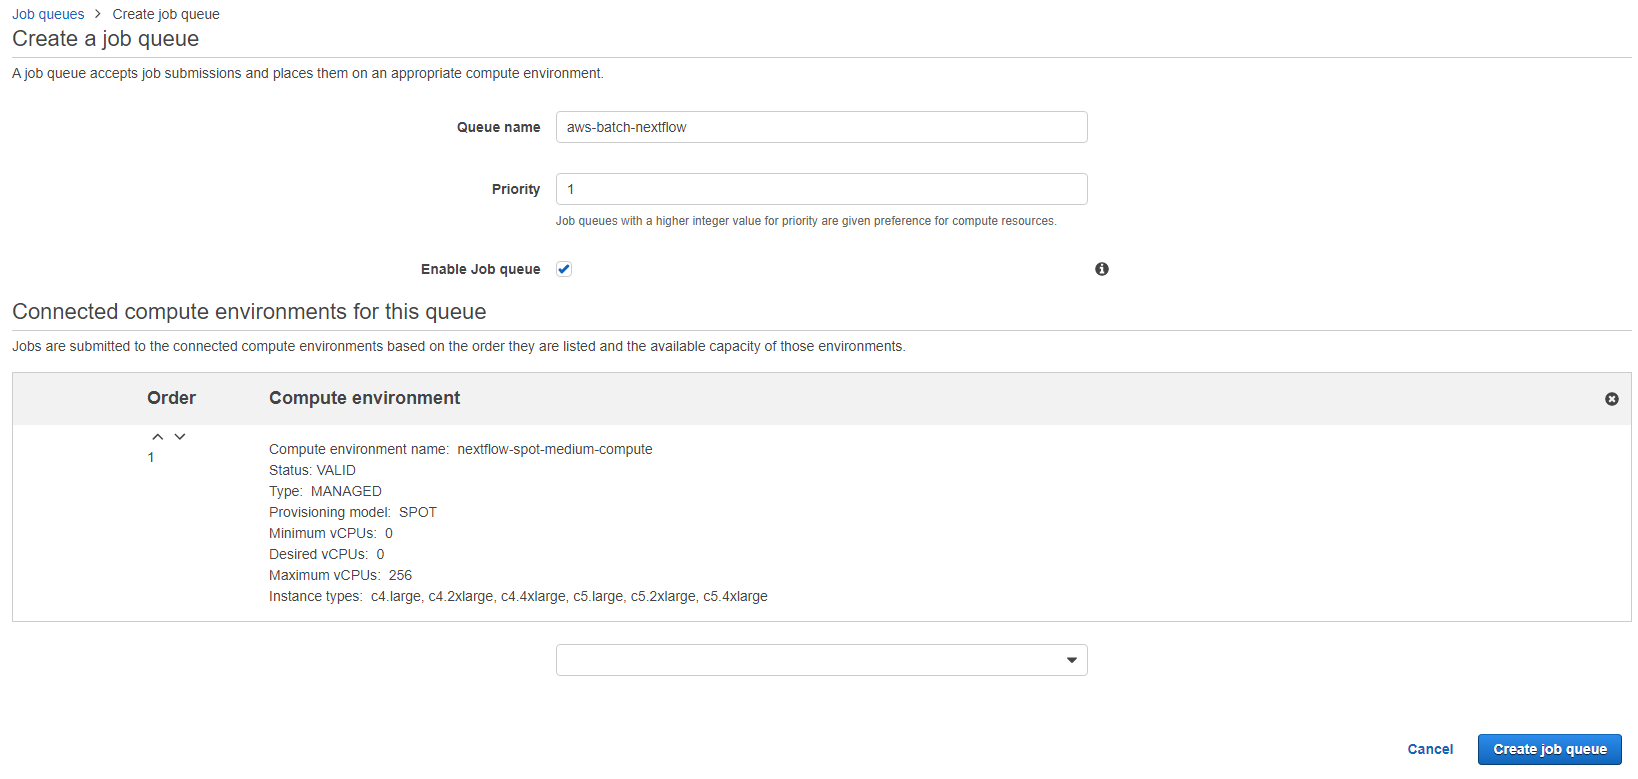
Step 4 Creating an AWS Batch Job queue
Next we need to create a queue where Nextflow can submit jobs to the compute environment. Navigate to the Batch service on the AWS management console and select Job queues and Create queue.
Enter the name of the queue (this will be needed later in nextflow) and give it a priority. A priority of 1 means that jobs submitted to the compute environment via this queue will have priority over jobs submitted via a queue with a lower priority. This does not matter if you only have 1 queue using the compute environment but if you have multiple queues you can define their priorities. Finally in the dropdown box select the compute environment we created in the previous section and click Create job queue.
The combination of job queue’s and compute environments allow for flexibility in how workflows use compute resources. If a step in your workflow needs access to high memory or GPUs then you can define a separate queue and compute environment for those steps specifically and define that in the Nextflow config.
Step 5 Setting up an S3 Bucket for data access
Nextflow can use S3 buckets to store and access data. Go to the S3 service under the AWS management console and select Create bucket. Name the bucket (will be used in the nextflow configuration) and select the appropriate region where you have configured everything else and select Create bucket. In the bucket create a folder test_env where Nextflow can work with files.
Step 6 Configuring Nextflow to use AWS Batch
In the final section of the guide there are a few parameters that need to be added to the Nextflow config in order to use the AWS Batch environment we created. There are a number of configuration variables that can be set (more here) but the basics are:
//indicate that we want to use awsbatch
process.executor = 'awsbatch'

//indicate the name of the AWS Batch job queue we want to use
process.queue = 'my-batch-queue'

//Name of the docker container we want to use, we can also specify a separate docker container for each process
process.container = 'quay.io/biocontainers/salmon'

//region where we want to run this in
aws.region = 'us-east-1'

//Important note!!! Since we created a custom AMI
//we need to specify the path to the aws cli tool
//if you followed the instructions above for custom AMI
//the path is:
aws.batch.cliPath = '/home/ec2-user/miniconda/bin/aws'

//Additionally if we want to use S3 to hold intermediate files we can specify the work directory
workDir = 's3://bucket_you_created/test_env/'
Finally, the last step is to setup your AWS-CLI and AWS user credentials. The easiest method is using conda, which can be installed on your host system following the same steps we used for the AMI:
wget curl https://repo.anaconda.com/miniconda/Miniconda3-latest-Linux-x86_64.sh -o Miniconda3-latest-Linux-x86_64.sh
bash Miniconda3-latest-Linux-x86_64.sh -p /home/ec2-user/miniconda
/home/ec2-user/miniconda/bin/conda install -c conda-forge awscli
/home/ec2-user/miniconda/bin/aws --version
In Step 1 Setting up a Nextflow user with IAM we created a user that would be able to access the AWS services and launch jobs. The best approach to give Nextflow access to our programmatic user is to use the command aws configure and enter the security credentials. After setting these configuration parameters your Nextflow workflow is ready to use AWS Batch!!
Another (not recommended) option is to include the credentials in the configuration however, this should not be used as the keys could be made accidentally public if you share your configuration file:
aws {
    accessKey = '<YOUR S3 ACCESS KEY>'
    secretKey = '<YOUR S3 SECRET KEY>'
    region = '<REGION IDENTIFIER>'
}
Tips and Tricks
AWS can be tricky to navigate if things aren’t working. Here are some various places you can look if things aren’t going as expected.
The biggest issue I’ve seen is jobs sitting in the RUNNABLE step in the AWS Batch Job queues and not moving to STARTING or RUNNING. This can be cause by a number of issues but it’s best to first check the roles and policies created above. Here are the roles and polices you should have:
Roles and respective policies for AWS Batch
- AmazonEC2SpotFleetRole
- AmazonEC2SpotFleetTaggingRole
- ecsInstanceRole
- AmazonS3FullAccess
- AmazonEC2ContainerServiceforEC2Role
- AWSBatchServiceRole
- AWSBatchServiceRole
Additionally, sometimes the jobs will move from RUNNABLE to FAILED. Clicking the number of jobs in the FAILED column will reveal the individual jobs and clicking on one might show the error message that caused it to fail via CloudWatch. That can often help diagnose issues in the compute environment.
Another location you may find error messages is under the EC2 service:
- If you are running On-Demand in the Launch Configurations under the EC2 service will show the configurations launched by AWS Batch and any potential issues or errors encountered.
- If you are running Spot instances examining the Spot Requests is a good place to look for errors as well. h
Setting up an AMI for GPU compute
The AMI setup above does not include the necessary dependencies for using Nvidia GPU compute resources. To use docker with a GPU resource, the base AMI needs to have the nvidia-docker library installed along with the correct GPU drivers. To build this AMI start by performing the same steps outlines in Step 2 Building a custom Amazon Machine Image, with one notable difference. When specifying the size of the volume used by docker keep in mind the size of the data used. If you are setting up an AMI for working with fast5 data you’ll need significantly more space. In my experience 300GB seems to work well.
After installing the dependencies in Step 2.2 Install dependencies for Nextflow. You will need to install nvidia-docker by following these steps:
distribution=$(. /etc/os-release;echo $ID$VERSION_ID)
curl -s -L https://nvidia.github.io/nvidia-docker/$distribution/nvidia-docker.repo | sudo tee /etc/yum.repos.d/nvidia-docker.repo
yum update
sudo yum install -y nvidia-docker2
Then install the appropriate GPU drivers. Here are the instructions for installing the v440.64 drivers for the Nvidia Tesla V100:
sudo yum install gcc, make, kernel-devel
curl http://us.download.nvidia.com/tesla/440.64.00/NVIDIA-Linux-x86_64-440.64.00.run -o NVIDIA-Linux-x86_64-440.64.00.run
sudo bash NVIDIA-Linux-x86_64-440.64.00.run
Once installed use nvidia-smi to test that the drives have been installed. If they are you should see the correct device and driver listed.
The last step is to enable the nvidia runtime for the docker environment. Usually this is done by using the --runtime=nvidia when starting containers using the docker run command. However, with Nextflow the runtime must be specified in the docker daemon configuration. Open the configuration file using sudo vi /etc/docker/daemon.json and edit the configuration file as below:
{
    "runtimes": {
        "nvidia": {
            "path": "nvidia-container-runtime",
            "runtimeArgs": []
        }
    },
    "default-runtime":"nvidia"
}
Once finished follow Step 2.3 Create the custom AMI and setup a compute environment using the new AMI!